
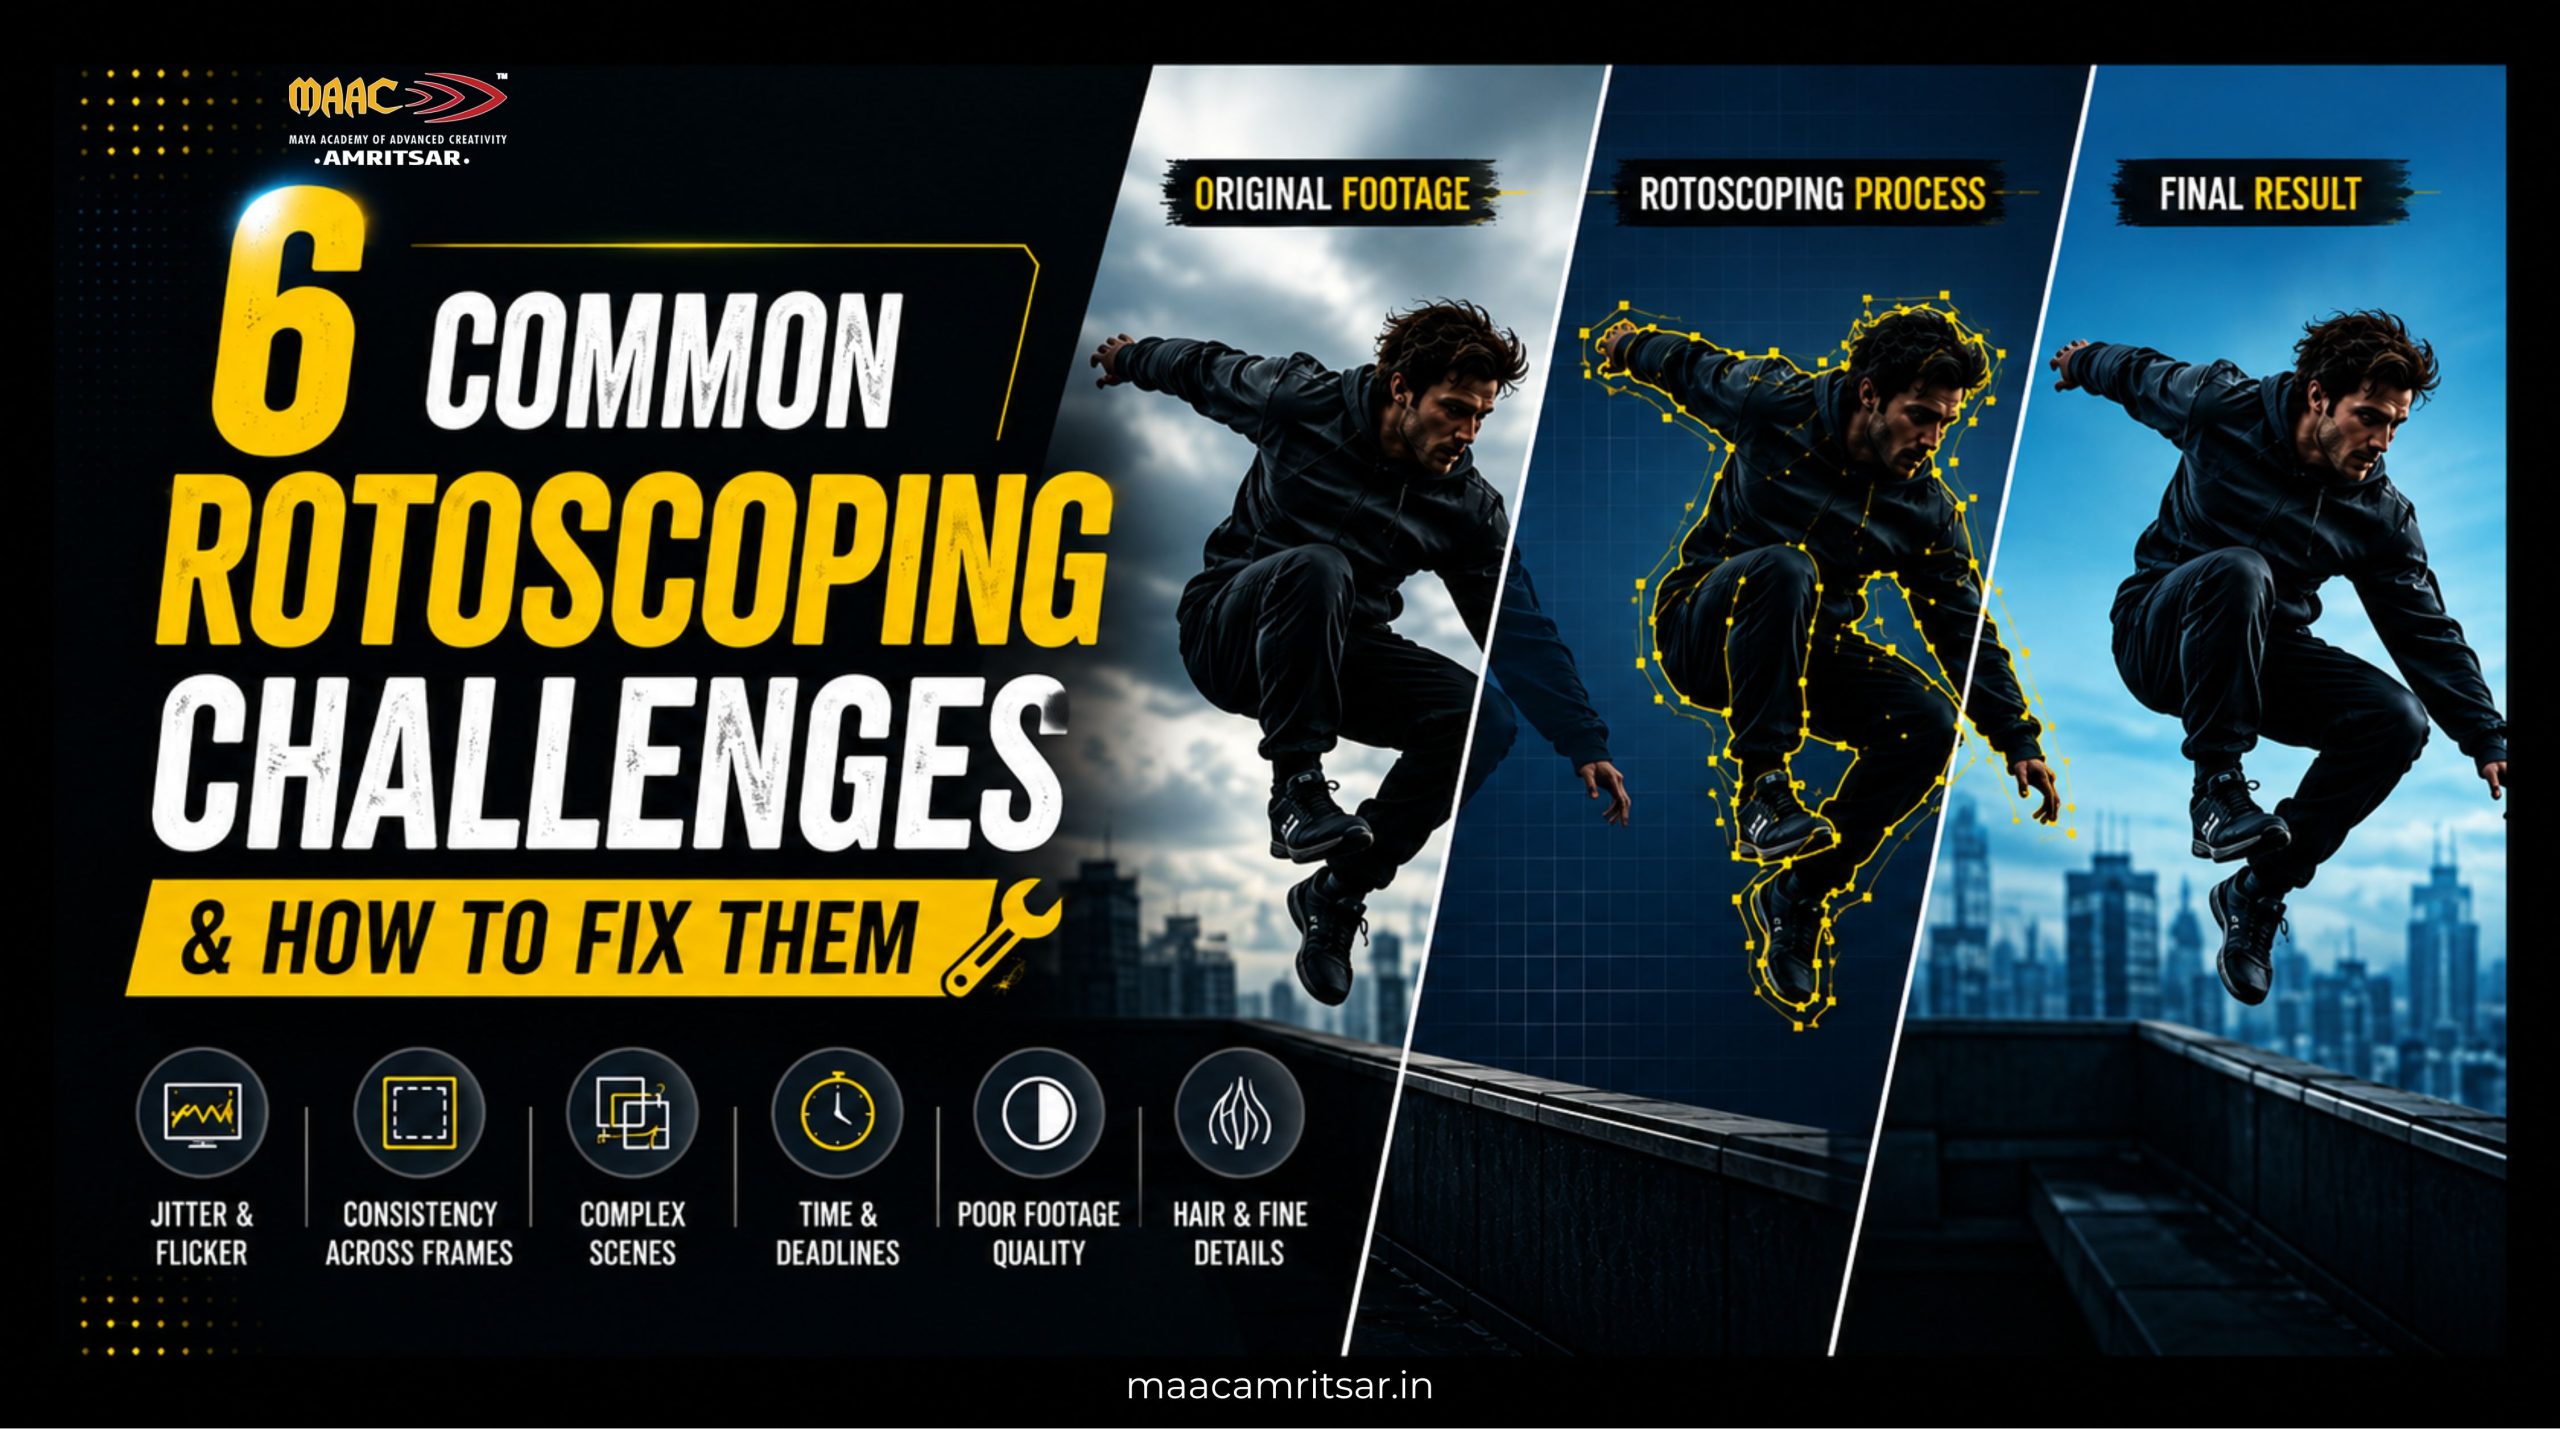
Rotoscoping looks like very simple task. But in actuality, it is time-intensive, and most rotoscoping challenges come down to maintaining consistency across hundreds of individual frames. Rotoscoping is one of those techniques that looks easy until you actually sit down and try it. Then you realize why this is considered one of the more demanding jobs in animation and VFX.
The good news is almost every rotoscoping challenge you will face already has known fix. We write this simple guide on common rotoscoping challenges with expert tips to solve them.
| What are effective tips to improve rotoscoping? 1. Use clean source footage 2. Divide complex subjects into separate masks 3. Create strong reference frames 4. Use tracking or AI-assisted tools for the first pass 5. Review the final matte during normal-speed playback |
Why Is Rotoscoping Harder Than It Looks?
Rotoscoping is technique used in VFX and compositing by artists when they need to separate person, object, or other element from its background. The result is called matte which tells compositing software which parts of frame should remain visible and which should become transparent.
At the very beginning, rotoscoping appears to be really easy. It involves selecting subject, outlining, and making mask. But problem comes when that mask has to keep up with the subject throughout the entire shot.
Take 5 seconds video shot recorded at 24 frames per second. This means that total recorded frames would be 120. If person moves fast, turns around, goes behind some object, or has hair or clothes that are free-flowing, the mask has to be adjusted all the time.
This is why good rotoscoping depends on three things:
- Accurate frame-by-frame or keyframe based masking
- Consistent movement of matte
- Careful review and cleanup before compositing
The goal is not to create most detailed mask possible on every frame. The goal is to create mask that stays accurate throughout the shot while using most efficient workflow.
6 Most Common Rotoscoping Challenges and How to Fix Them
Let’s get into some common rotoscoping challenges that artists face and how to actually fix them.
Challenge 1: Frame to Frame Jitter and Flicker
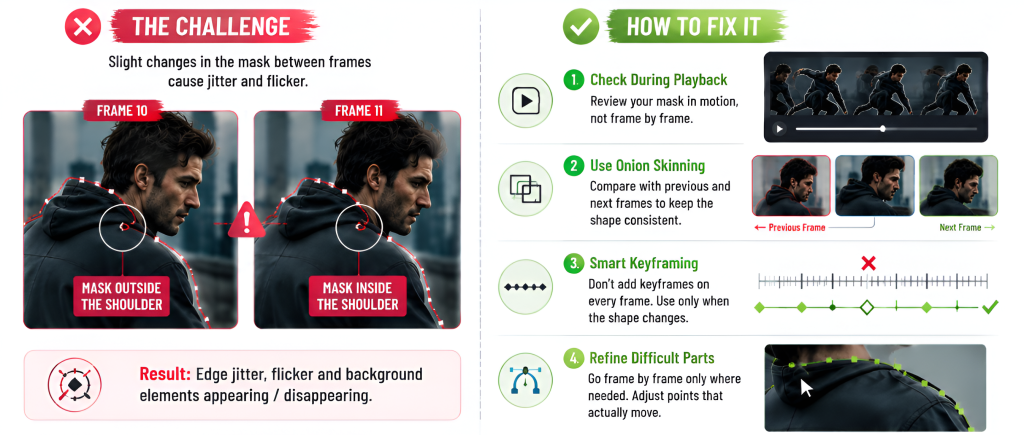
This is one of the most frustrating rotoscoping challenges because they break illusion of smooth motion and instantly draw the viewer’s eye. Jitter shows up when your tracing is not perfectly consistent from one frame to the next.
For example:
Let’s consider case where shoulder outline is drawn. If mask is placed slightly outside the shoulder in one frame and inside it in the next frame then outline will show jitter when played back.
Flickering occurs when small elements of your background reappear and disappear from frame to frame.
This issue frequently appears with masks that are drawn manually, with fast objects being in motion, changing mask edges, and poor tracking during motion.
How to fix:
- Check the mask while you are playing back your work instead of checking frames independently.
- Use onion skinning or previous and next-frame references when available. These features make it easier to compare current mask with nearby frames and maintain consistent shape.
- Avoid creating keyframes every time the program creates a new frame.
- For difficult parts, go through each frame and adjust only the points that really move from their original position.
If you are using tracker, adjust tracking approach according to the footage. Tracking method that works well on hard surfaces may not work equally well on moving hair or loose clothing.
In short, the simple thing is to make the mask movement match the subject’s actual movement.
Challenge 2: Keeping Things Consistent Across Hundreds of Frames
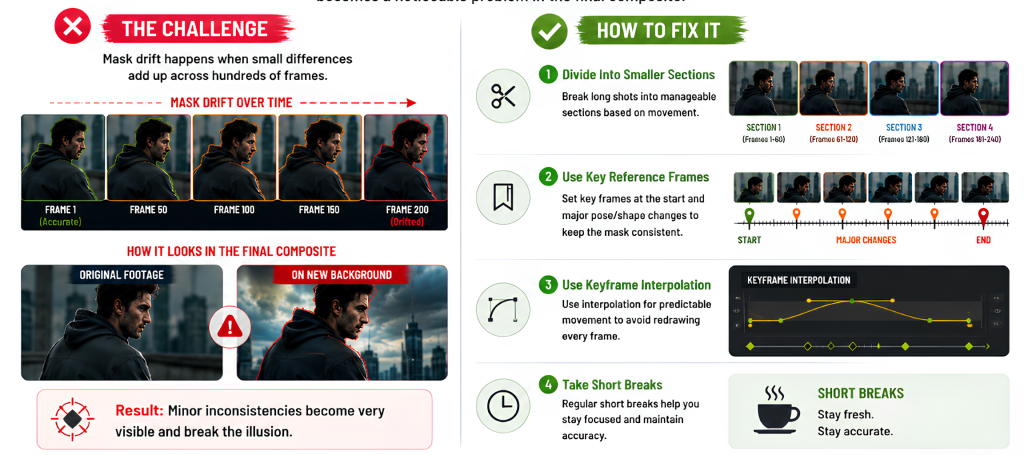
Rotoscoping is repetitive task and long rotoscoping sequences become difficult due to repetition and fatigue. Rotoscoping artists start sequences with very accurate masks. But after working through hundreds of frames, small changes in judgement appear. Then the mask may slowly become wider, tighter and differently shaped.
This process of change is called mask drift.
The problem becomes clearer when your image is placed on new background. Minor imperfections that are hard to recognize in original footage can become quite clear in resulting composite.
How to fix:
- Do not try to finish 20 seconds sequence in one continuous session. Divide long shots into smaller sections according to movement.
- Use your important frames as references like beginning of movement and major changes in body position. These references help you consistently shape work toward when mask starts drifting.
- Another thing to keep in mind is you can use keyframe interpolation when appropriate. If the movement of the subject is easy to predict then manual redrawing of every frame is unnecessary.
- Take short breaks during long roto sessions because accuracy of your work reduces if you work on same footage for long hours.
Challenge 3: Complex Scenes With Multiple Moving Elements
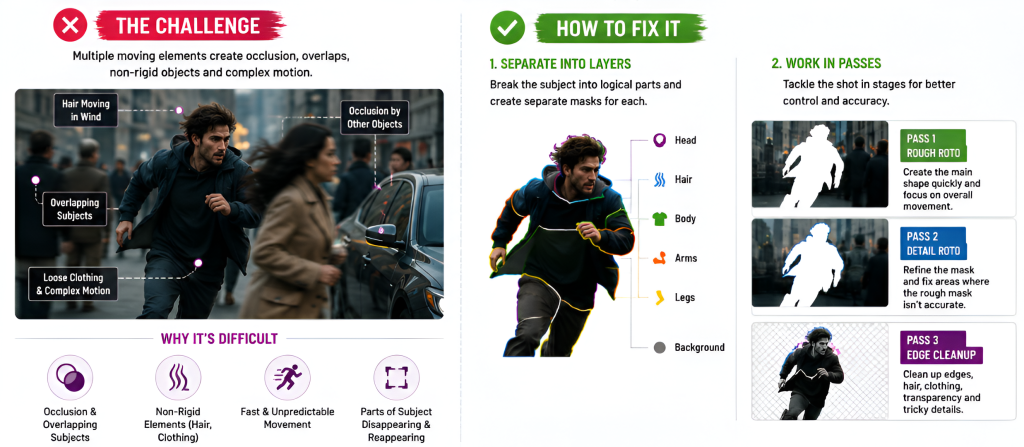
Let’s understand this with example. Rotoscoping will be easy if person is walking against plain background. Similarly, now imagine if person is running through crowded street while wearing loose jacket. Another person crosses in front of them, their hair moves in wind, and part of their body disappears behind car. Now difficulty in rotoscoping will increase.
This happens because of occlusion, overlapping subjects, non rigid objects, and complex motion.
How to fix:
Separate your scene into different layers. For example, instead of creating one complicated layer for entire person, you can use separate shapes for head, legs, and hair. Create separate masks only when different parts of the subject require different movement. For difficult shots, you can work in passes.
| Pass 1: Rough roto | It can create main shape quickly and focus on the overall movement. |
| Pass 2: Detail roto | It corrects areas where rough mask does not follow the subject accurately. |
| Pass 3: Edge cleanup | This works on hair, clothing, transparent areas, and other difficult edges. |
How to Handle Complex Rotoscoping Shots: MAAC Amritsar Instructor Approach
According to MAAC Amritsar instructor Ashwani Kumar, he notices one common mistake beginners make is treating an entire complicated subject as one mask.
Instructor Approach:
Think about image depicting person walking in loose jacket with their hair flowing and other objects occasionally moving past. If we take this image, we can split it into several parts such as body, arms, hair, etc., instead of creating one complicated mask that fits all these details.
First, we track body itself, then we correct hard parts. Next, we apply correct edge refinement and feathering to hair and loose clothing.
This way this method affords easier reviewing since one can see exactly what part of the mask is troublesome. Besides, the number of points to change can be reduced as only one part of the moving body may create inconvenience.
For students who study rotoscopy, this is important point in workflow: faster is not always fewer masks.
Challenge 4: Time Cost and Deadline
If we do rotoscoping manually, it takes time because artist has to inspect and correct moving shapes throughout sequence. The actual time required depends heavily on footage.
Rotoscoping done quickly for short clip with person standing against plain background. On the other hand, similar length clip with fast movement, hair, motion blur, and multiple overlapping subjects can take much time to roto. This makes time estimation difficult for production teams and freelance artists.
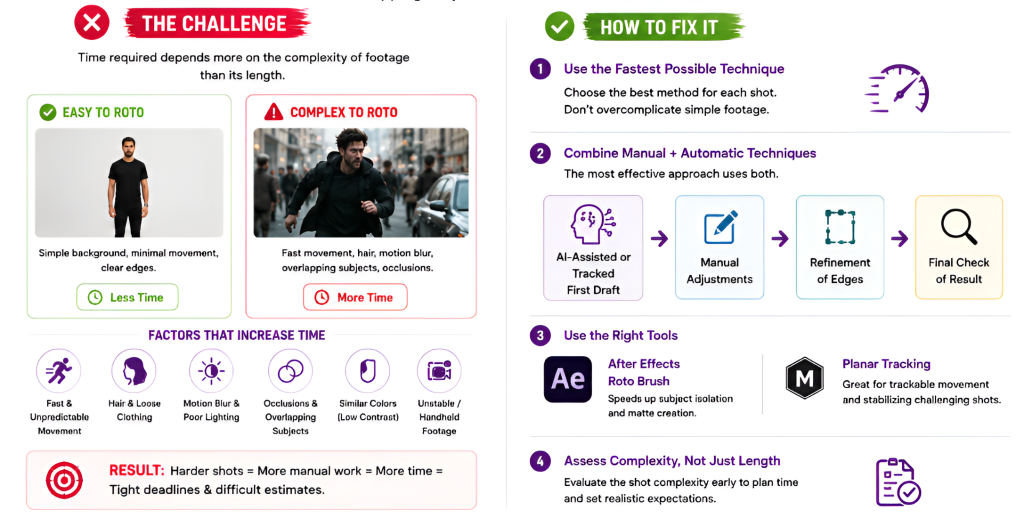
How to fix:
- Apply fastest possible technique for every piece of your footage.
- Do not just pick between manual and automatic rotoscoping. Best effective approach usually utilizes both methods.
For example:
AI-assisted or tracked first draft → manual adjustments of result → refinement of edges → final check of result.
Adobe After Effects features Roto Brush tools that assist operators in isolating subjects and improving mattes. These tools may decrease amount of manual masking but still require revisions.
Another option to use in some situations is planar tracking that may be useful for footage with trackable movement.
When timeframes are very close, assess complexity of the footage instead of video length.
Challenge 5: Working With Poor Source Footage
Quality of footage is one of the common rotoscoping challenges faced by roto artists. It can make rotoscoping easier or much harder. The lack of contrast between the subject and background is a problem that occurs frequently. For example, a person wearing a dark shirt in a dark background will have their edges determined inaccurately.
Some other common rotoscoping problems include:
- Motion blurriness
- Poor illumination
- High compression ratio
- Shifting shadows
- Similar colors in the foreground and background
- Out-of-focus image
These issues affect both manual masking and automated tracking.
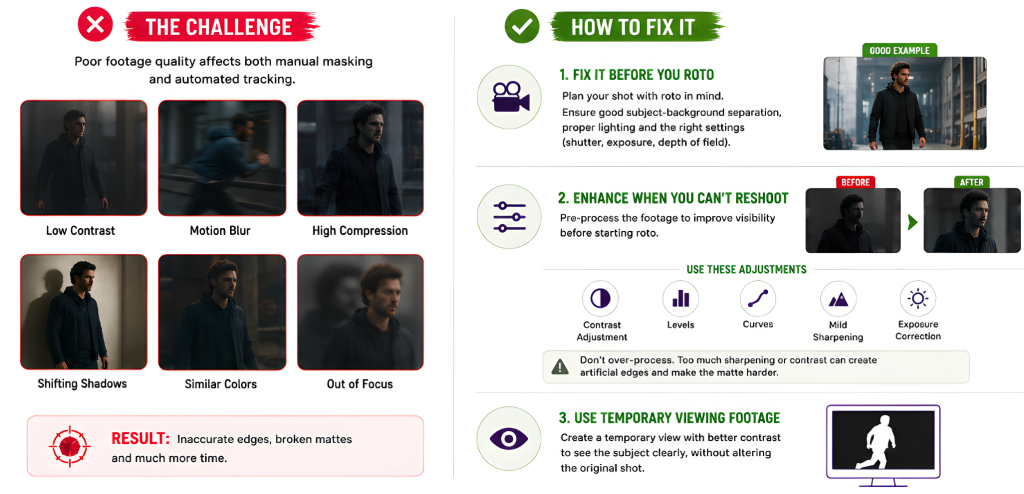
How to fix:
The best solution is to fix the clip before starting with roto. If your clip has been shot specifically for VFX, it is necessary to think about subject matter and background beforehand. This becomes especially crucial when shooting footage with large depth of field.
For example, if your subject is wearing dark clothing, avoid placing them against an equally dark background when possible.
Motion blur is also important to pay attention to when planning the clip. When the footage is being shot specifically for a VFX shot, proper shutter settings should be applied to keep the edges of the subject sharp. When you cannot reshoot the footage then pre-process the clip before rotoscoping.
You may be able to improve visibility using:
- Contrast adjustments
- Levels
- Curves
- Mild sharpening
- Exposure correction
It is important not to over-process your footage. Too much sharpening can produce artificial edges making it difficult to create the matte. It could be useful to come up with temporary viewing footage that allows seeing the subject clearly without changing your original shot.
Challenge 6: Edge Accuracy on Hair, Fur and Semi-Transparent Objects
Fine details are very difficult part and one of the most common rotoscoping challenges. The edge of human body is clear and distinct but not in the case of hair. Strands of hair behave independently, vanish into the background, or are seen as blurred when in motion. Fur behaves in the same way. Semitransparent materials such as smoke, glass, thin fabric, and motion-blurred objects are tougher to work with. There may not always be tangible edge that needs to be masked.
Therefore, seeking to create an ideal hard mask around each strand of hair is ineffective.
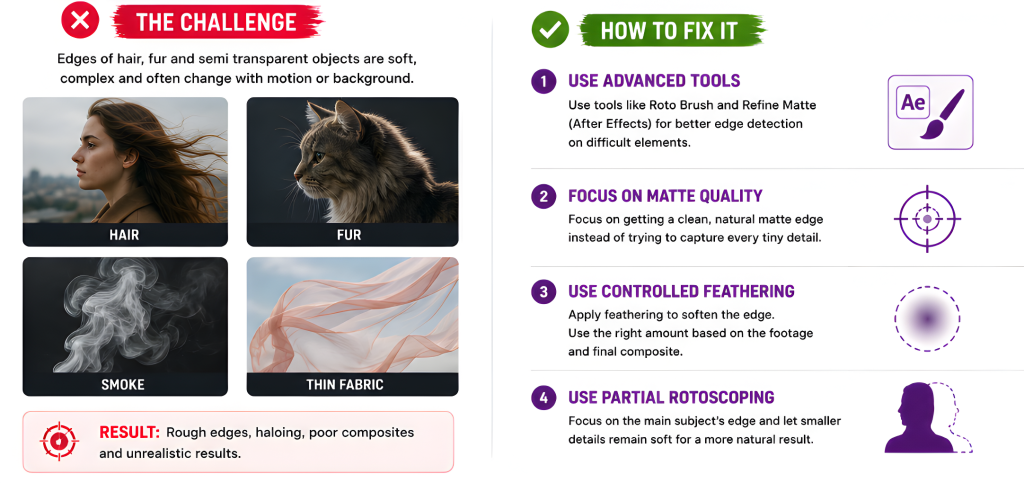
How to fix:
- Try to make use of advanced edge-enhancement tools whenever possible instead of using only simple brush or pen mask.
For example, rotoscoping in After Effects provides Roto Brush and Refine Matte workflows that can help with difficult edges.
- For fine details, focus on quality of matte edge rather than trying to create perfectly visible outline.
- You can use controlled feathering which may help soften the edge. The amount of feathering one should apply should depend on the video material and the composite. Too extensive feathering leads to blurriness and overall poor appearance of the character.
- Partial rotoscoping is also helpful technique. Try to pay most attention to the edge of the primary character which will allow getting soft results with the edges of smaller details.
Expert Tips for Faster and Cleaner Rotoscoping
Once you understand common rotoscoping problems and solutions, these few habits make the whole rotoscoping process smoother from the start:
- Plan for rotoscoping before shooting: If you know your shot will require rotoscoping later. Then plan lighting, background, wardrobe, camera movement, and shutter settings accordingly. Because good footage can save hours during post-production.
- Keep your project settings consistent: Avoid unnecessary changes to frame rate, resolution, or footage interpretation during the workflow. Consistent project setup makes tracking, interpolation, rendering, and review easier.
- Use automation for repetitive work: Tracking and AI-assisted masking can reduce repetitive manual work. Use these tools for first pass then inspect result carefully. The goal is to spend your time correcting important frames rather than manually drawing everything the software can handle reliably.
- Review at normal playback speed: Mask can look perfect when you move one frame at a time and still look poor during playback. So after every major section, play your footage at normal speed. Look specifically for:
- Edge popping
- Jitter
- Flicker
- Mask slipping
- Sudden changes in softness
- Background appearing around the subject
If something looks wrong during playback, go back to the frames causing the problem.
- Save reusable masks: If same character appears repeatedly, save useful masks, shapes, or templates where your software and project structure allow it. You should still check them against each new shot because camera angle and movement can change the required shape.
Read Full Article: How to Create Rotoscope Animation: A Complete Beginner’s Guide
Tools That Help Minimize Rotoscoping Challenges
These rotoscoping software tools are useful for different rotoscoping challenges:
| Rotoscoping Software | Why it is used |
| Adobe After Effects | It is used for VFX compositing and includes Roto Brush and Refine Matte workflows for subject isolation and edge refinement. |
| Mocha Pro | It is useful when planar movement and tracking are important. It can help with planar tracking, rotoscoping, object removal, and stabilization. |
| Silhouette | This software provides dedicated roto and tracking workflows. It is designed for detailed rotoscoping and includes tools for tracking, edge work, onion skin viewing, and complex shape animation. |
- The important point is to choose tool according to shoot. Because sometimes simple subject may not need advanced tracking and sometimes complex moving object may benefit greatly from it.
Final Thoughts
Rotoscoping becomes easier task if you stop considering every frame as independent drawing process.
- The first step is to have good footage to work with and look out for good reference frames.
- Use tools like tracking and interpolation where applicable.
- Divide complicated subjects into simpler components and do manual work on those parts of frames and edges that require it.
Most important is always checking your work in motion. Matte may look great in one frame but may create noticeable flicker or slip in the actual shot. Checking your work regularly helps you detect such issues before final composite.
For anyone learning VFX, these skills take practice. One learns how masks work, how tracking works and fails, and how much detail one needs. With proper workflow and lots of practice, you will learn how to tackle even toughest rotoscoping tasks. Hope this article on common rotoscoping challenges will be helpful for you to fix problems. If you enjoyed reading this article, share your thoughts and suggest what next topic you want an article about from our side.
FAQs
Rotoscoping is challenging task that requires accurate shape work across moving footage. Difficulty of work depends on shot. Simple clip can manage by beginners but fast moving hair, transparency, and motion blur can make the same process difficult.
Professionals follow process of edge refinement, tracking, soft mattes, feathering, and making manual adjustments. The quality of edges is ultimately determined by their use in the composite and background.
Rotoscoping is 2D animation and VFX compositing technique in which artists mask live action video frame by frame.
Footage with clear subject background separation, good lighting, controlled motion blur, and sufficient image detail is generally easier to rotoscope.
Leave a Reply